Monday, April 29, 2013

What is a Home Soil Test Kit?


Home Soil Test Kit
Home soil test kits are found in garden centers, local hardware stores and are readily available online. Their job is to test the soil’s pH by using a small sample. They are easy to use and typically less expensive than sending a sample off to the lab.

What is Soil pH?


Basically, the pH level of the soil tells you how acidic, or not, the soil is. Acidity is measured using a numbers system, 0-14. If the home soil test kit measures 0-7, it is acidic. 7 and above is alkaline. A 7.0 means the soil is neutral, and for many plants, nutritious enough to grow.

What is Acidic Soil?


Acidic soil is what many gardeners refer to as sour. Using powdered limestone is a great way to make acidic soil neutral.


What is Alkaline Soil? 


Alkaline soil is on the sweeter side, and can be amended with ground sulfur.

Note: When amending soil, don’t expect to see results overnight. Some amendments take months to work their way into the soil. Even then, it’s okay not to have a perfect 7.0 pH. Most plants, unless otherwise stated, thrive in soil with a pH level between 6.5-6.8.

Using a home soil test kit let’s gardeners determine which types of plants will grow best in their existing soil and whether or not they need to add amendments such as lime, sulfur or organic materials.


Monday, April 22, 2013

Gibby’s Garden Diary Entry #2: Leaves as Mulch?


April 22, 2013

Despite the windy weekend, I did get some raking done and managed to get one of my gardens mulched. I decided to convert one of my vegetable beds into a permanent herb garden. The garden gets plenty of sun and is conveniently close to house so I can wonder outside while cooking and snip the fresh herbs that I need.

As far as the mulching goes - I killed 2 birds with one stone as the saying goes. All the leaves I raked went into the designated herb garden. Now, this isn’t a choice all gardeners would make because it does have some drawbacks, but I’m trying something a little new this gardening season.

Here’s the plan. Since I’m putting in herbs and I’ve decided to go with plants from my local nursery to save on time, I’m not planning on tilling my entire herb garden. I’ll be doing the tilling by hand as I plant each herb and adding my finished compost as I go.

My plan, to help save on time since I go crazy planting vegetables each season, is to mulch  my gardens before doing the planting. Since my large vegetable beds will be tilled later this month or the beginning of the next, I’ll wait to mulch those with mulch hay. As I plant my plants and seeds, I’ll rake the mulch to the side for each individual row and replace it as necessary.

I’m hoping this will save time and help me to not get worn out. Plus, it’ll keep the weeds down from the beginning of the season saving even more time. My goal is to implement new ways to save time on gardening, something that I love, that way I don’t get burnt out and I can have time to enjoy other things this summer.

Now, as for using leaves as mulch, I typically don’t do this. As I mentioned before it does have some drawbacks, but it also has a good side. First the good side. Leaves, at least in my yard, are abundant and free! They’re also organic and will break down over time. As for the drawbacks, a thick layer of leaves provides the perfect hiding spot for pests. Brown leaves are also not the prettiest things to look at.

I’ll have to wait and see just how many pests the leaves invite into my garden this season before I can tell if it’s worth the free and abundant mulch. I figure when my plants go in and begin to grow, they’ll detract the eye from the brown leaves.

For the record, I wouldn’t use leaves that have been piled up all winter long or for a few seasons. I’ve tried this before and they were full of ants and had already begun to break down. The leaves I used were the ones I was too lazy to rake up last fall.

I’ll keep you guys posted on how well my time saving experiment works throughout the gardening season. Until then . . .

View previous posts


Gibby’s Garden Diary 2012

View Previous Post

Gibby's Garden Diary 2013


Friday, April 19, 2013

How to Grow Cauliflower in the North

Candid Charm Hybrid

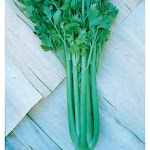
Cauliflower is a long season vegetable that, under the right conditions, can be successfully grown in the north. The key is to use cauliflower transplants that take 70 days or less to mature ,and to grow them in a fertile, sunny location.

Cauliflower Information


Vegetable Type: Annual
Name: Brassica oleracea botrytis
Genus: Cabbage Family

How to Start Cauliflower from Seed


Seed Starting Supplies


  • Trays/Pots
  • Organic Potting Soil
  • Cauliflower Seed
  • Small Watering Can
  • Sunny Location Indoors


Directions


(start indoors 4-6 weeks before average spring frost)

1. Fill trays ¾ way full with organic potting mix
2. Follow spacing requirements on back of cauliflower seed packet when sowing in trays, or 1-3 seeds per pot
3. Sprinkle 1/8” of soil over seeds
4. Water lightly
5. Keep seed tray in a sunny location and keep well watered

How to Grow Cauliflower Outdoors in the North


When: When temps are consistently 55°F or warmer in spring
Soil Type: Very fertile, well-draining soil (amend with finished compost/composted manure)
Spacing: Plant cauliflower 18-24” apart in rows
Light: Full sun
Watering: Keep consistently watered
Weeding: Weed consistently
Mulching: Apply mulch to reduce weeds and retain moisture
Fertilizing: Add compost to bed before planting and side dress plants with organic fertilizer high in nitrogen 3 weeks later
Care: For cauliflower varieties that are not self blanching, wrap leaves over head and tie at top to blanch when heads are almost full size (check seed packet for size). Check cauliflower a week to 12 days after tying, at which time they should be ready for harvest.

Common Cauliflower Pests and Diseases in the North


Pests

Harlequin Bugs: Look for black and white eggs on undersides of leaves as well as nymphs pale orange or black in color with spots. Adults are red and black spotted and crest-like in shape. They leave behind wilted, browning spots on leaves, eventually killing the plant. Handpick/spray with soapy water to control organically.

Cabbage Worms: Look for green worms and white cocoons. Handpick all worms and cocoons, drowning in soapy water. Use floating row covers to prevent pests.

Aphids: Look for tiny, pear-shaped yellow, green or brown insects with long antennae and legs. Treat by spraying with a mixture of 1 tablespoon vegetable oil and ½ teaspoon of liquid soap mixed into a quart of water (shake well before using).

Diseases

Black Rot: Look for yellowing leaves eventually dying and falling off plants. Plants may also develop black spots/veins caused by bacteria. Plant resistant varieties and do not plant where members of the same family have grown in the past 2 years.

Clubroot: Caused by a fungus. Stop fungus from spreading by digging up and removing all cabbage roots and tendrils. Place in plastic bags and dispose - do not add to compost or fungus may be left behind. Test soil pH and raise above 7.2 if need be.

How to Harvest Cauliflower


  • Look for compact heads that are tightly balled and firm to the touch. Color will vary depending on the cauliflower variety planted. 
  • Cleanly slice heads just above ground level leaving a few leaves attached to the head (offers a little protection).


Tips for Storing Cauliflower


  • Cauliflower lasts for about a week when refrigerated 
  • Pickle or freeze for longer storage

Types of Cauliflower


Open Pollinated: Turns white on it’s own without wrapping the head with outer leaves of plant and tying.

White: Most common variety; easy to find in produce sections of the store. Produces all white heads.

Purple: All purple heads are mild in taste, typically turning green after cooking.

Orange: Produces orange heads full of beta carotene. This type is sometimes called Cheddar cauliflower.

Broccoflower or Green: Produces green heads. This type is a cross between broccoli and cauliflower.


Varieties of Cauliflower Best for the North


Orange Cauliflower Varieties


Cheddar Hybrid
Cheddar Hybrid: Newer variety. Produces 4-7” domed heads orange in color. Full of beta carotene. Easy to grow. One of the best hybrid varieties for the north. 68 days from transplants.

White Cauliflower Varieties


Self Blanche: Self blanching variety. Produces fine grained, smooth heads with tightly packed leaves. Great for pickling/freezing. 52 days from transplants.

Snow Crown Hybrid: Vigorous variety. Produces 2 lb. heads 7-8” in diameter. Easy to grow. 55 days from transplants.

Freemont: Adaptable variety. Produces white heads uniform in size. Self-blanching. 62 days from transplants.

Candid Charm Hybrid: High-yielding variety. Produces dense heads and thick wrapper leaves for extra protection. Very flavorful. 65 days from transplants.

Snowball Y Improved: Short season variety. Produces 6” heads surrounded by curled leaves. 65 days from transplants.

Bishop: Adaptable variety. Produces uniform heads with leaves that are self covering. Strong and vigorous plants. 65 days from transplants.


Related Articles

How to Blanch and Freeze Vegetables
How to Make Your Own Seed Tapes

Wednesday, April 17, 2013

Best Varieties of Cauliflower to Grow in the North


Cheddar Hybrid
The best varieties of cauliflower to grow in the north take 70 days or less to mature from transplanting. Always use seedlings started indoors or transplants from the local nursery when growing cauliflower for the best results.

Types of Cauliflower


Open Pollinated: Turns white on it’s own without wrapping the head with outer leaves of plant and tying.

White: Most common variety; easy to find in produce sections of the store. Produces all white heads.

Purple: All purple heads are mild in taste, typically turning green after cooking.

Orange: Produces orange heads full of beta carotene. This type is sometimes called Cheddar cauliflower.

Broccoflower or Green: Produces green heads. This type is a cross between broccoli and cauliflower.


Varieties of Cauliflower Best for the North


Orange Cauliflower Varieties


Cheddar Hybrid: Newer variety. Produces 4-7” domed heads orange in color. Full of beta carotene. Easy to grow. One of the best hybrid varieties for the north. 68 days from transplants.

White Cauliflower Varieties


Candid Charm Hybrid
Self Blanche: Self blanching variety. Produces fine grained, smooth heads with tightly packed leaves. Great for pickling/freezing. 52 days from transplants.

Snow Crown Hybrid: Vigorous variety. Produces 2 lb. heads 7-8” in diameter. Easy to grow. 55 days from transplants.

Freemont: Adaptable variety. Produces white heads uniform in size. Self-blanching. 62 days from transplants.

Candid Charm Hybrid: High-yielding variety. Produces dense heads and thick wrapper leaves for extra protection. Very flavorful. 65 days from transplants.

Snowball Y Improved: Short season variety. Produces 6” heads surrounded by curled leaves. 65 days from transplants.

Bishop: Adaptable variety. Produces uniform heads with leaves that are self covering. Strong and vigorous plants. 65 days from transplants.


Wednesday, April 10, 2013

How to Grow Celery in the North


Tango Hybrid Celery
Celery is considered a long-season vegetable - meaning it takes a long time to grow to maturity. With that said, northern gardeners looking for a challenge should try and grow it themselves. For the crunchiest and most flavorful stalks, make sure to grow celery under the right conditions and always use transplants or start seeds indoors to accommodate the north’s short growing season.

Celery Information 


Vegetable Type: Annual
Name: Apium graveolens var. dulce
Family: Parsley

How to Grow Celery from Seed


  • Start seeds 10-11 weeks before last scheduled frost
  • Fill seed trays or pots ¾" with organic vegetable potting soil
  • Pour seeds into envelope, add 1-2 tablespoons of sand; shake to mix
  • Sprinkle seed mix over seed trays
  • Loosely cover with 1/8” of soil
  • Water lightly
  • Set pots in sunny window
  • When seedlings reach 2-3” tall, thin to 1 seedling per pot
  • Keep seedlings moist until transplanting

How to Grow Celery Outdoors in the North


Growing celery in the north can be a tricky process - sometimes taking a few seasons to get the growing conditions right. Wait until temperatures are steadily 50°F or higher to transplant. Transplanting celery while soil and air temperatures are cool will kill off or stunt the plants.

When: All danger of frost has past and temps are consistently 50°F or higher
Soil: Fertile, well-draining soil. Till 3-4” of compost or composted manure into new beds before transplanting to provide plenty of nutrients
Light: Full-sun to part shade. Celery needs a good 6 hours of light a day
Spacing: 12” apart in rows 18-24” apart
Watering: Keep soil evenly moist - do not let soil dry out. Check plants daily, especially during dry periods
Fertilizing: Add 1-2” of compost/composted manure every 3-4 weeks as plants grow
Weeding: Keep well weeded so weeds don’t compete for water/nutrients
Mulching: Mulch around plants to prevent weeds and keep soil moist

Celery is a very heavy feeder and requires lots of nutrients to grow thick, healthy stalks. Always keep the plants well watered because the plants are not drought resistant. A lack of water will result in woody, thin stalks with little flavor.

Special Tips for Growing Celery


Support: As stalks grow, push soil up around bottom of plants for needed support
Blanching: Place cartons or brown paper bags (no bottoms) over stalks making sure leaves receive sunlight to whiten stalks

How to Harvest Celery


Harvest individual stalks for a longer harvest period or cleanly slice entire plant slightly below ground level with a sharp knife.

How to Store Celery


Store celery for up to a month in the fridge. If stalks go limp, place in a container of cold water to make crunchy again.


Celery Pest and Disease Control


Common Celery Pests


Aphids: Look for tiny, pear-shaped yellow, green or brown insects with long antennae and legs. Treat by spraying with a mixture of 1 tablespoon vegetable oil and ½ teaspoon of liquid soap mixed into a quart of water (shake well before using).
Snails/Slugs: Set out beer traps to trap slugs and snails. Fill empty tin cans (tuna) ¾ full with beer. Pests will crawl in and drown. Empty traps once a week, replacing bait.
Flea Beetles: Adults are 1/10 of an inch long and bronze, brown or black in color with long legs. They leave behind lots of small holes in cabbage leaves. Gently cultivate soil around plants to kill flea eggs. Control adults with floating row covers.
Carrot Root Fly: Maggots that feed on roots damaging or killing them. If the carrot root fly is a problem, harvest as soon as vegetables are ready. The Royal Horticultural Society lists several ways to treat carrot root flies organically.

Common Celery Diseases


Early Blight: Common in late summer/early fall. Begins with yellowing of leaves that turn brown in wet weather. Brown stripes may appear on stems.
Late Blight: Common in beginning of growing season. Begins with yellowing of leaves that turn brown. Remove all signs of blight from plants.
Dampening Off: When seedlings fail to emerge due to wet, cool conditions. Keep seedlings well watered but in a warm environment.
Bacterial Leaf Spot: Wet spots on leaves turn from yellow to brown. The main cause of this fungus is failure to remove celery plants from the garden from the previous season.

* Rotating crops is an effective way to help prevent celery diseases. To treat blight organically, try using an organic based copper fungicide.

Pest/Disease Source: Portlandnursery.com


Best Varieties of Celery to Grow in the North


Conquistador: Early variety - good for growing in the north. Produces tall, crisp stalks that are full of flavor. Adapts well. 80 days.

Tango Hybrid: High-yielding. Produces crunchy, sweet stalks ready for harvest 2 weeks earlier than older varieties. Resists Fusariums. 85 days.

Leafy Celery Varieties

Safir Leafy Celery

Safir: Peppery and crisp in taste. Produces abundant, leafy tops and lots of thin stalks. Harvest as needed. 78 days.


Celeriac Varieties


Prinz: High-yielding. Variety produces uniform roots large in size and creamy white in color. 95 days.

Sources: Park Seed Co., Generic Seeds, Johnny's Selected Seeds

Related Articles
How to Blanch and Freeze Vegetables
How to Make Your Own Seed Tapes

Monday, April 8, 2013

5 Gardening Tips for the Month of April


The month of April is a great time to get outdoors and get the garden ready for next month’s planting. I suggest waiting until the garden is thoroughly dry before doing any work to prevent compacting the soil. While waiting for the soil to dry, start your seeds indoors and then head out to clear and till your garden beds.

Tip #1: Clear All Garden Beds


It’s important to clear all garden beds of leaves, branches and debris to allow sunlight to penetrate the soil. This helps warm soil temps, making the ground workable for next month’s planting.

Tip #2: Till Dry Garden Beds Only


If the soil has adequately dried, go ahead and till it. If it’s still wet - probably so at the beginning of April - wait to till until the end of the month for the best results. Dry soil is much easier to work.

Tip #3: Till in Amendments


Again, wait until the soil is dry and till in finished compost or composted manure to give garden beds a boost of nutrients. A few inches is all that is typically needed to replenish the nutrients soaked up during the last growing season. Follow my compost guide on how much compost to add to the garden.

Tip #4: Start Seeds Indoors


In the north, the general rule of thumb is to start seeds indoors 4-6 weeks, sometimes 8-10 weeks for long-season vegetables, before the last scheduled frost. If you haven’t already, get your seeds started now. 

Tip #5: Turn Compost Piles


Don’t forget to give your compost pile some much needed attention after a long winter. Turn it over to allow air to circulate and the sun to reach the areas that are still frozen. April is the time to think about starting a new compost pile for the season or continue to add scraps to last years.

What will you be doing in your garden this April? 

Related Posts

Gardening Tips for the Month of March
Gardening Tips for the Month of April
Gardening Tips for the Month of May
July Gardening Tips for the Vegetable Garden
Organic Vegetable Gardening Tips for the Month of August
4 Organic Vegetable Gardening Tips for the Month of September
Organic Gardening Tips for the Month of October
Guide to Backyard Composting

Friday, April 5, 2013

Types and Varieties of Celery

Tango Hybrid Celery
There are 3 main types of celery and a handful of varieties to choose from. When selecting a variety to grow, consider your USDA zone and how long a growing season you have.

Types of Celery


Celery: Produces long, crunchy stalks green to dark green in color with minimal foliage on top.

Leafy Celery: Produces thin stalks and lots of edible foliage. This type of celery is sometimes called cutting celery.

Celeriac: A root vegetable. Produces large roots which must be peeled before eaten.


Varieties of Differernt Types of Celery

Celery Varieties


Conquistador: Early variety - good for growing in the north. Produces tall, crisp stalks that are full of flavor. Adapts well. 80 days.

Tango Hybrid: High-yielding. Produces crunchy, sweet stalks ready for harvest 2 weeks earlier than older varieties. Resists Fusariums. 85 days.

Utah 52-70: Produces dark green stalks, some up to 12” tall, and strong rooted plants. Adapts well to different climates and soils. 100 days.

Leafy Celery Varieties


Safir Leafy Celery
Safir: Peppery and crisp in taste. Produces abundant, leafy tops and lots of thin stalks. Harvest as needed. 78 days.

Celeriac Varieties


Prinz: High-yielding. Variety produces uniform roots large in size and creamy white in color. 95 days. 

Monarch Celeriac
Monarch: Roots are large, firm and creamy white in color. Has a celery-like taste. Tolerates celery virus very well. 100 days. 

Brilliant: Pale green in color with curly tops. Stores well, up to 3 months. Crisp, refreshing flavor. 105-115 days. 


Sources: Gurney's Seed and Nursery Co., Park Seed Co., Generic Seeds, Johnny's Selected Seeds


Wednesday, April 3, 2013

Best Types of Celery to Grow in the North

Tango Hybrid Celery

Celery is a great vegetable to try growing, even in the north. Normally, I’d suggest a variety that takes 70 days or less to mature to fit our growing season, but since celery is slow to grow, I did my best to come up with some varieties to try.

Celery Varieties


Conquistador: Early variety - good for growing in the north. Produces tall, crisp stalks that are full of flavor. Adapts well. 80 days.

Tango Hybrid: High-yielding. Produces crunchy, sweet stalks ready for harvest 2 weeks earlier than older varieties. Resists Fusariums. 85 days.

Leafy Celery Varieties

Safir Leafy Celery

Safir: Peppery and crisp in taste. Produces abundant, leafy tops and lots of thin stalks. Harvest as needed. 78 days.


Celeriac Varieties

Monarch Celeriac


Prinz: High-yielding. Variety produces uniform roots large in size and creamy white in color. 95 days.


Sources: Park Seed Co., Generic Seeds, Johnny's Selected Seeds

Monday, April 1, 2013

Gibby’s Garden Diary is Back for 2013!


April 1, 2013


The first of April seemed like a good time for Gibby’s Garden to make our first garden diary entry of the year. Despite the foot of snow we had on the first day of spring, it seems like we’ll be on schedule for starting to plant our gardens at the end of the month here in the north.

I’ve already ordered and received most of my seeds and can’t wait to get them in the ground, though I’ll have to be patient as the last of the snow melts and the ground thaws. While I wait until my gardens are workable and ready for some fresh compost and tilling, I’ll be busy making rough sketches of where each of my vegetables are to go.

Until the ground dries up and I can get outside and begin cleaning and working my gardens, there isn’t much else to do but plan, plan, plan and trust me, I have plenty of that to do with the seeds I ordered for this year.


What’s on the List of Vegetables to Plant in 2013?


  • Peas - Northfield
  • Spinach - Tyee
  • Corn - Northern Xtra Sweet Hybrid
  • Beans - Improved Golden Wax/Blue Lake Bush 
  • Beets - Ruby Queen
  • Carrots - Envy Hybrid
  • Chard - Bright Lights
  • Cucumbers - Miss Pickler Hybrid
  • Eggplant - Twilight Hybrid
  • Kohlrabi - Early White Vienna
  • Radish - Mixture
  • Turnips - Purple Top White Globe
  • Squash - Winter Table Ace Hybrid


These are the seeds I plan on planting to give myself a wide array of vegetables to work with and enjoy in 2013. Stay tuned to find out which seedlings and their varieties I’ll be picking up at my favorite nursery in another month or so. Until then, happy garden planting and please don’t forget to stop by occasionally for more garden diary updates.